Testing the new 'IBIS High resolution shot' feature in the Canon EOS R5 1.8.1 firmware update
Sure, it's JPEG-only, tripod-only, electronic shutter-only, is limited to 1/2 second maximum shutter speed, cannot be automatically bracketed, has no options, and might ultimately fry my computer—still, considering all that, I have to admit the new 'IBIS High resolution shot' feature is kind of amazing...
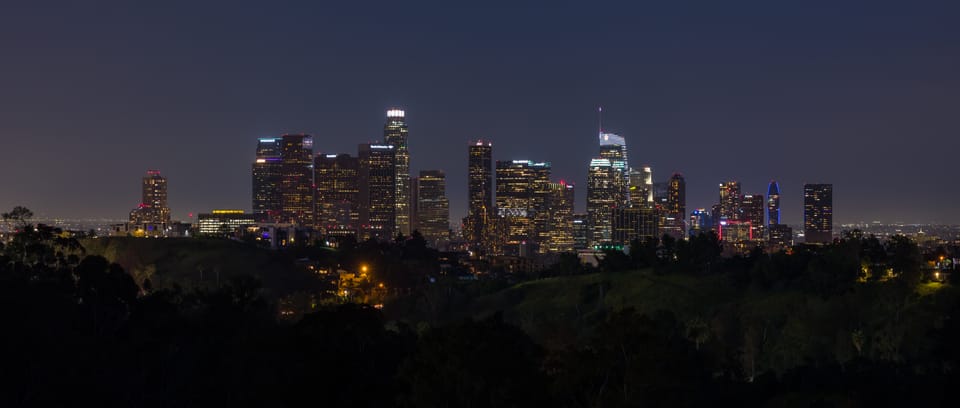
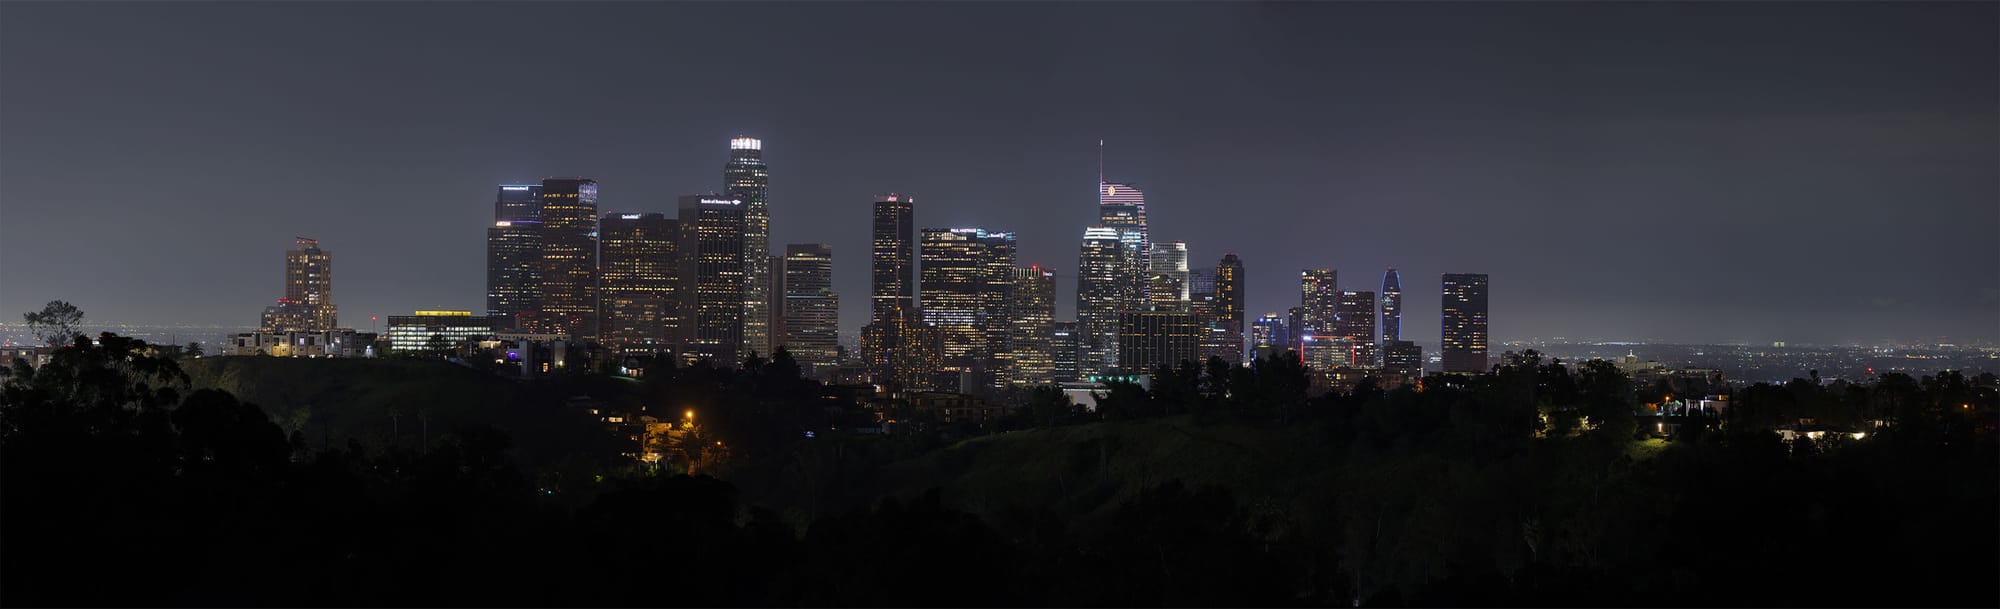
My friend Tony and I were taking photos of the LA skyline the other night and I decided to take a series of shots using the high res shot feature to see how it would work in that kind of scenario. I started off by framing the city with my 24-70 lens. Given I was limited to a half-second exposure I bumped up to ISO 800—in retrospect, I don't remember why I didn't open the aperture more... Since the high res mode only gives you a JPEG, I processed the non high-res shot in Canon Digital Photo Professional so that the raw file would match the high res JPEG (if I had just exported from Lightroom it would have had an Adobe or a custom color profile, neither of which would have looked the same). I then put the normal 45MP shots next to the 400MP high-res shots in Photoshop. First comparing 100% zoom levels, then comparative where the 45MP gets scaled up to 300% to roughly match the size of the 400MP at 100%, and then the 400MP to 33% to match the framing of the 45MP shot at 100%. Here are the results:
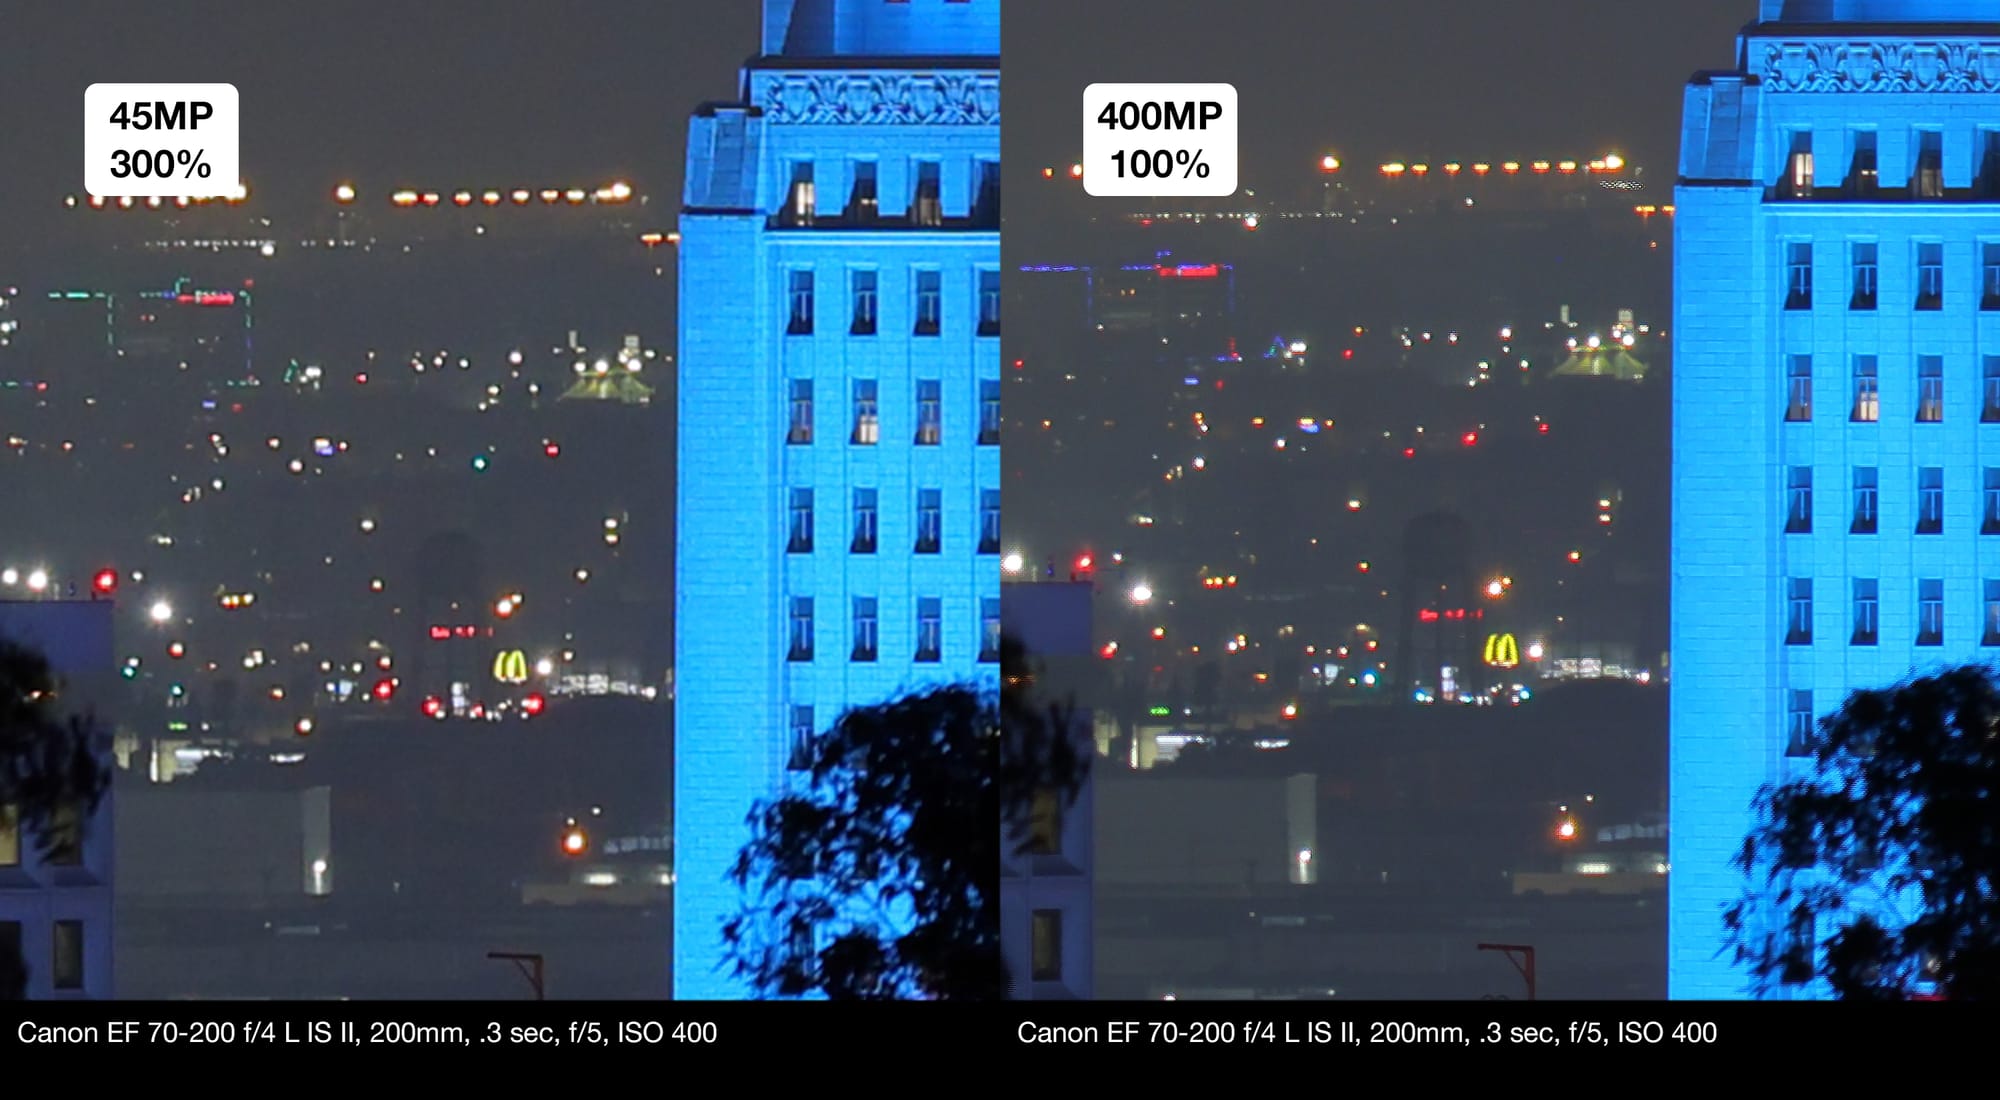

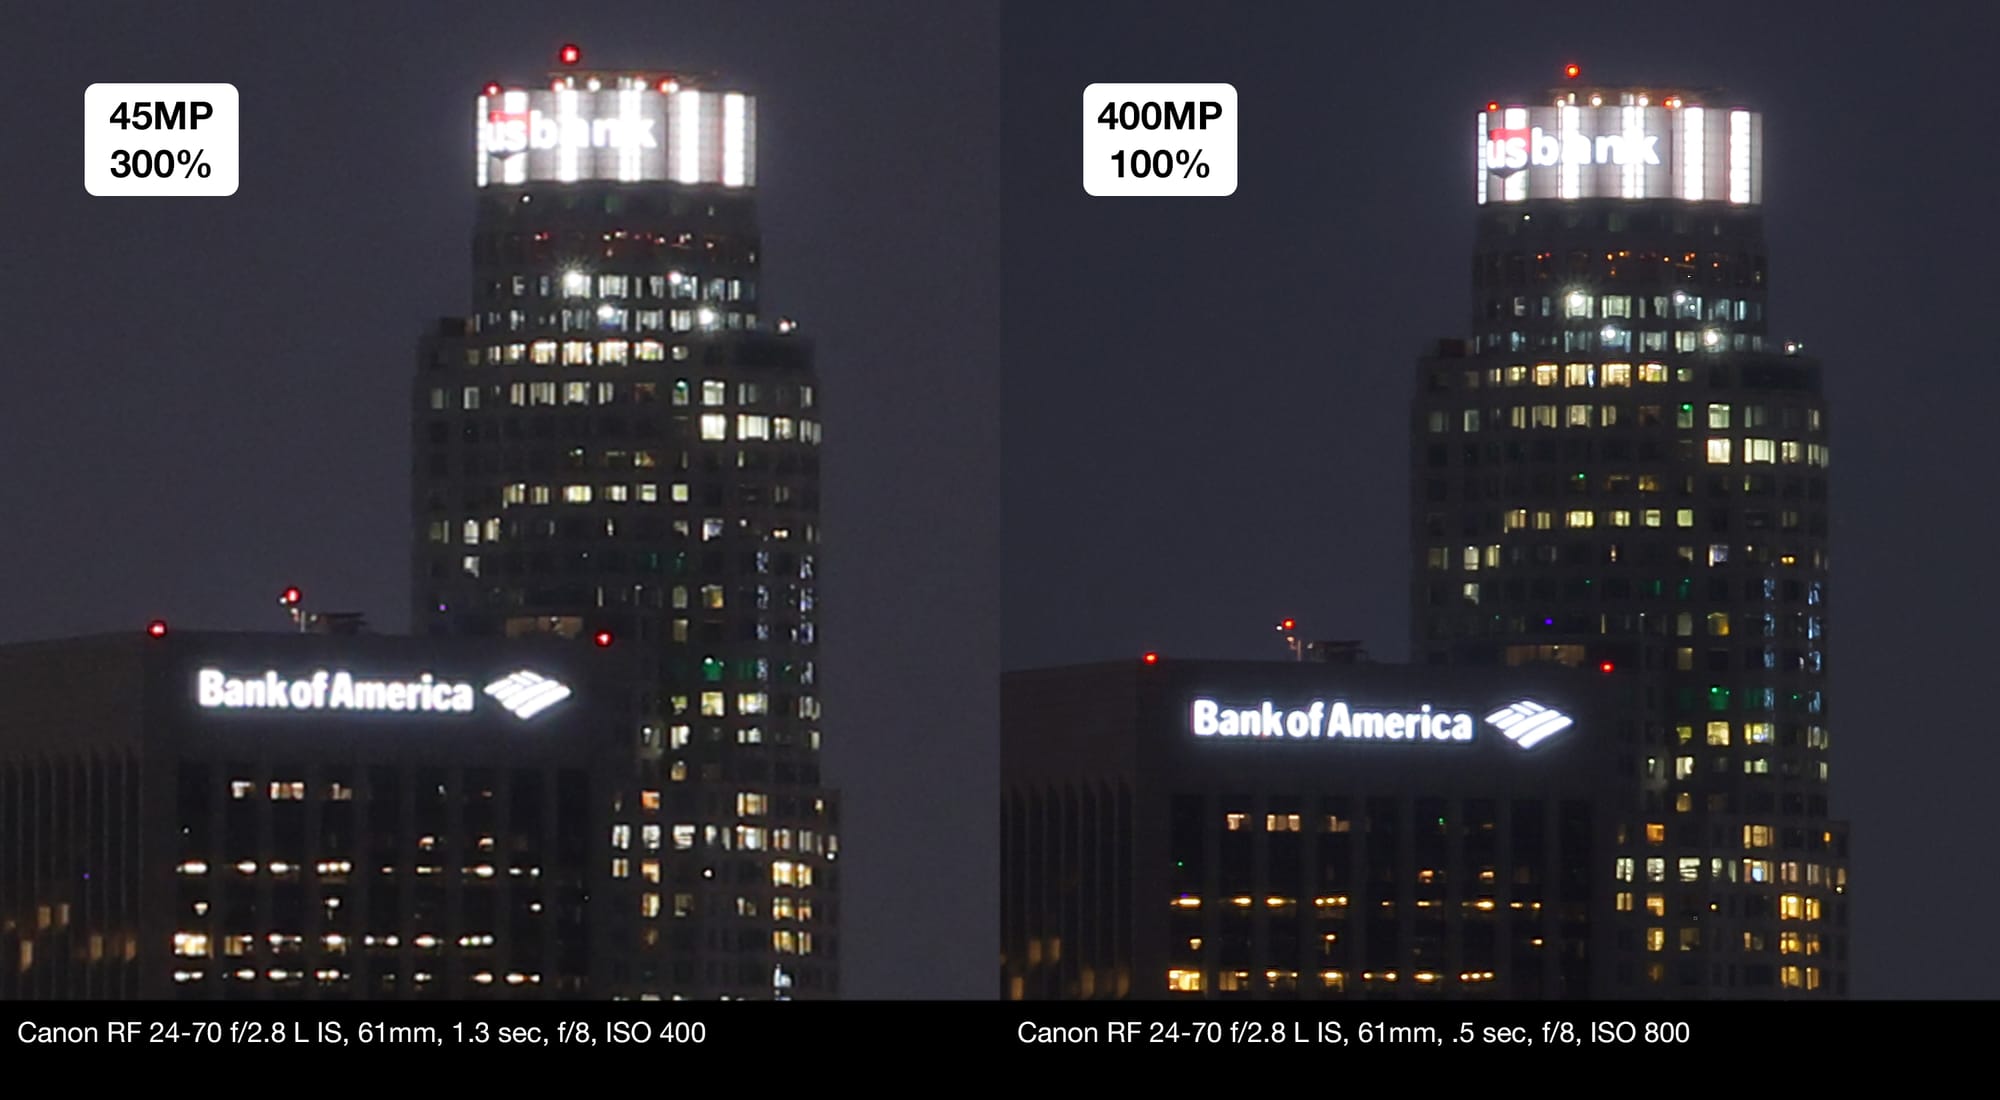
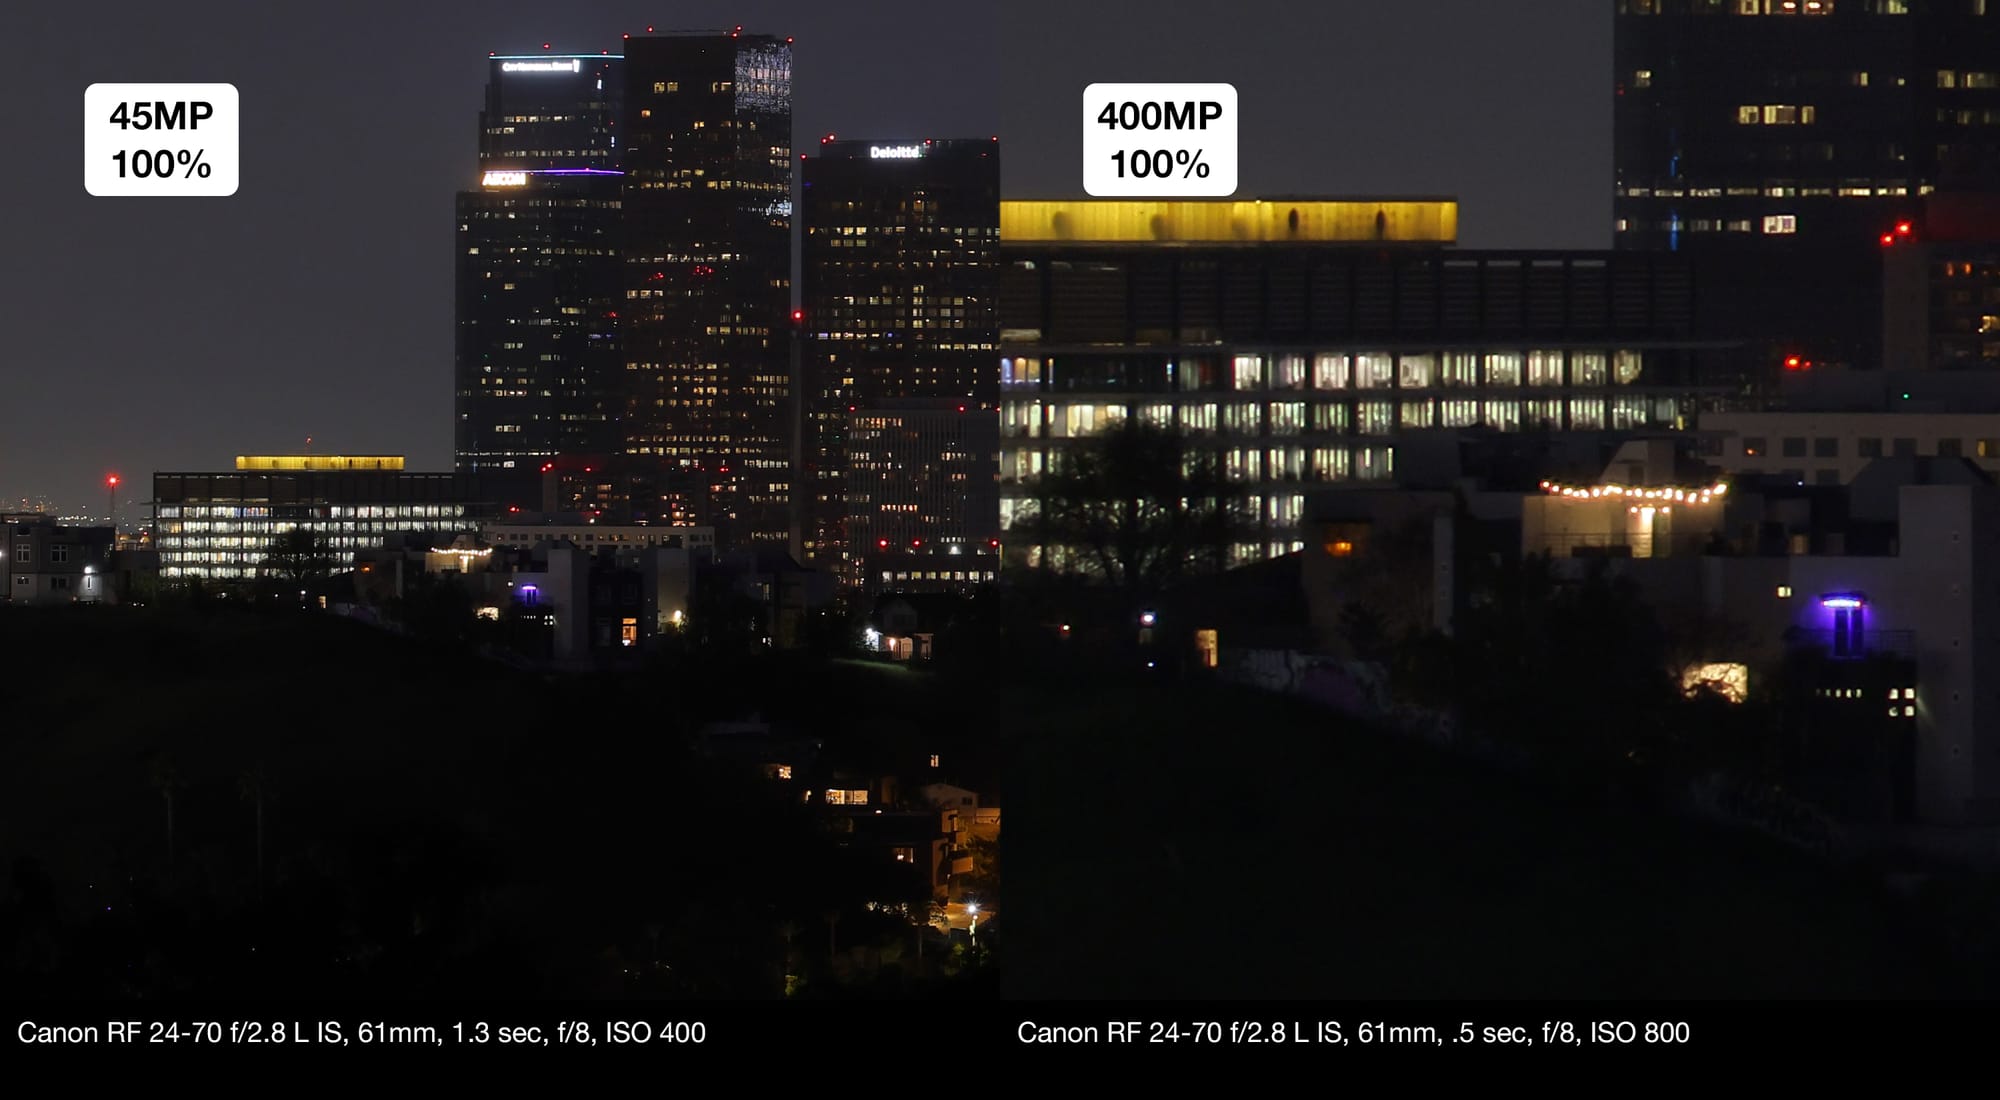
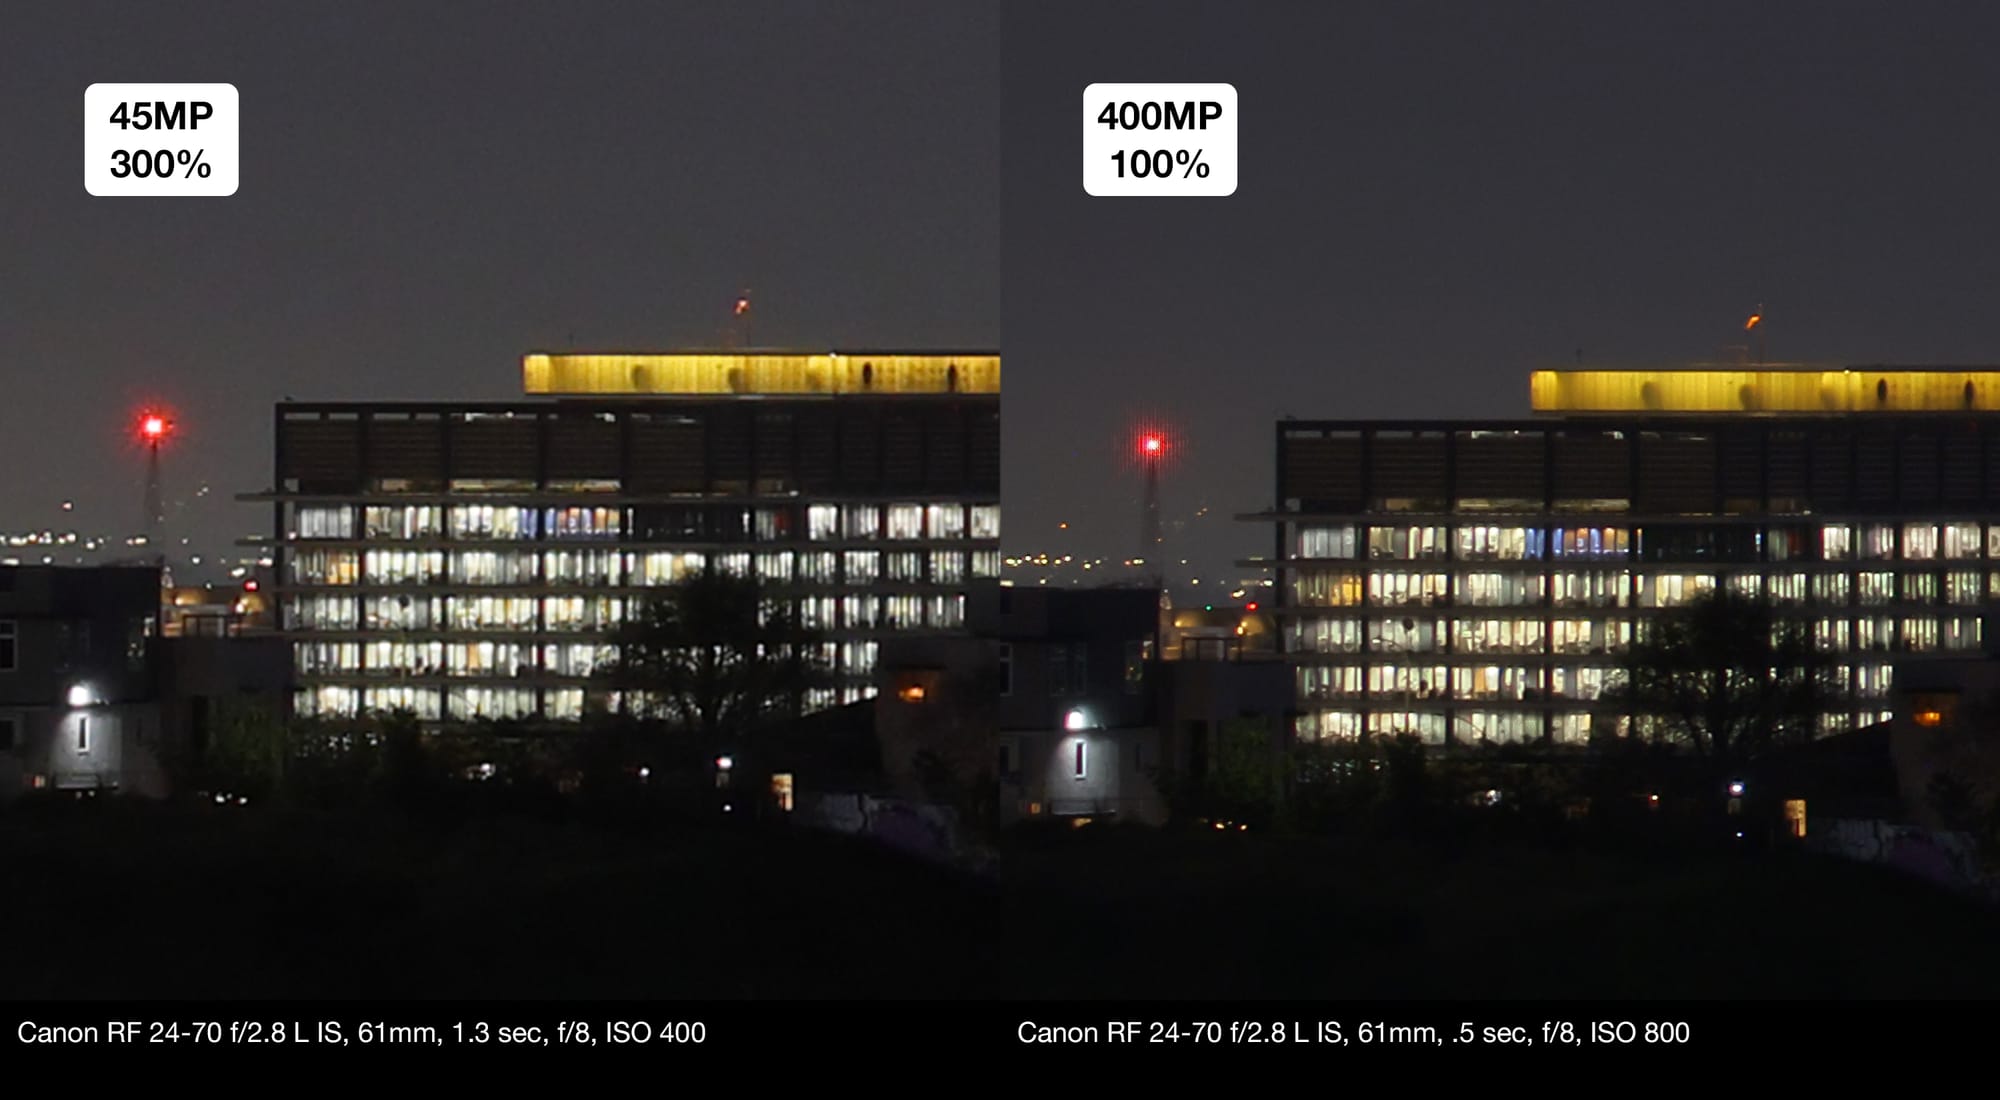
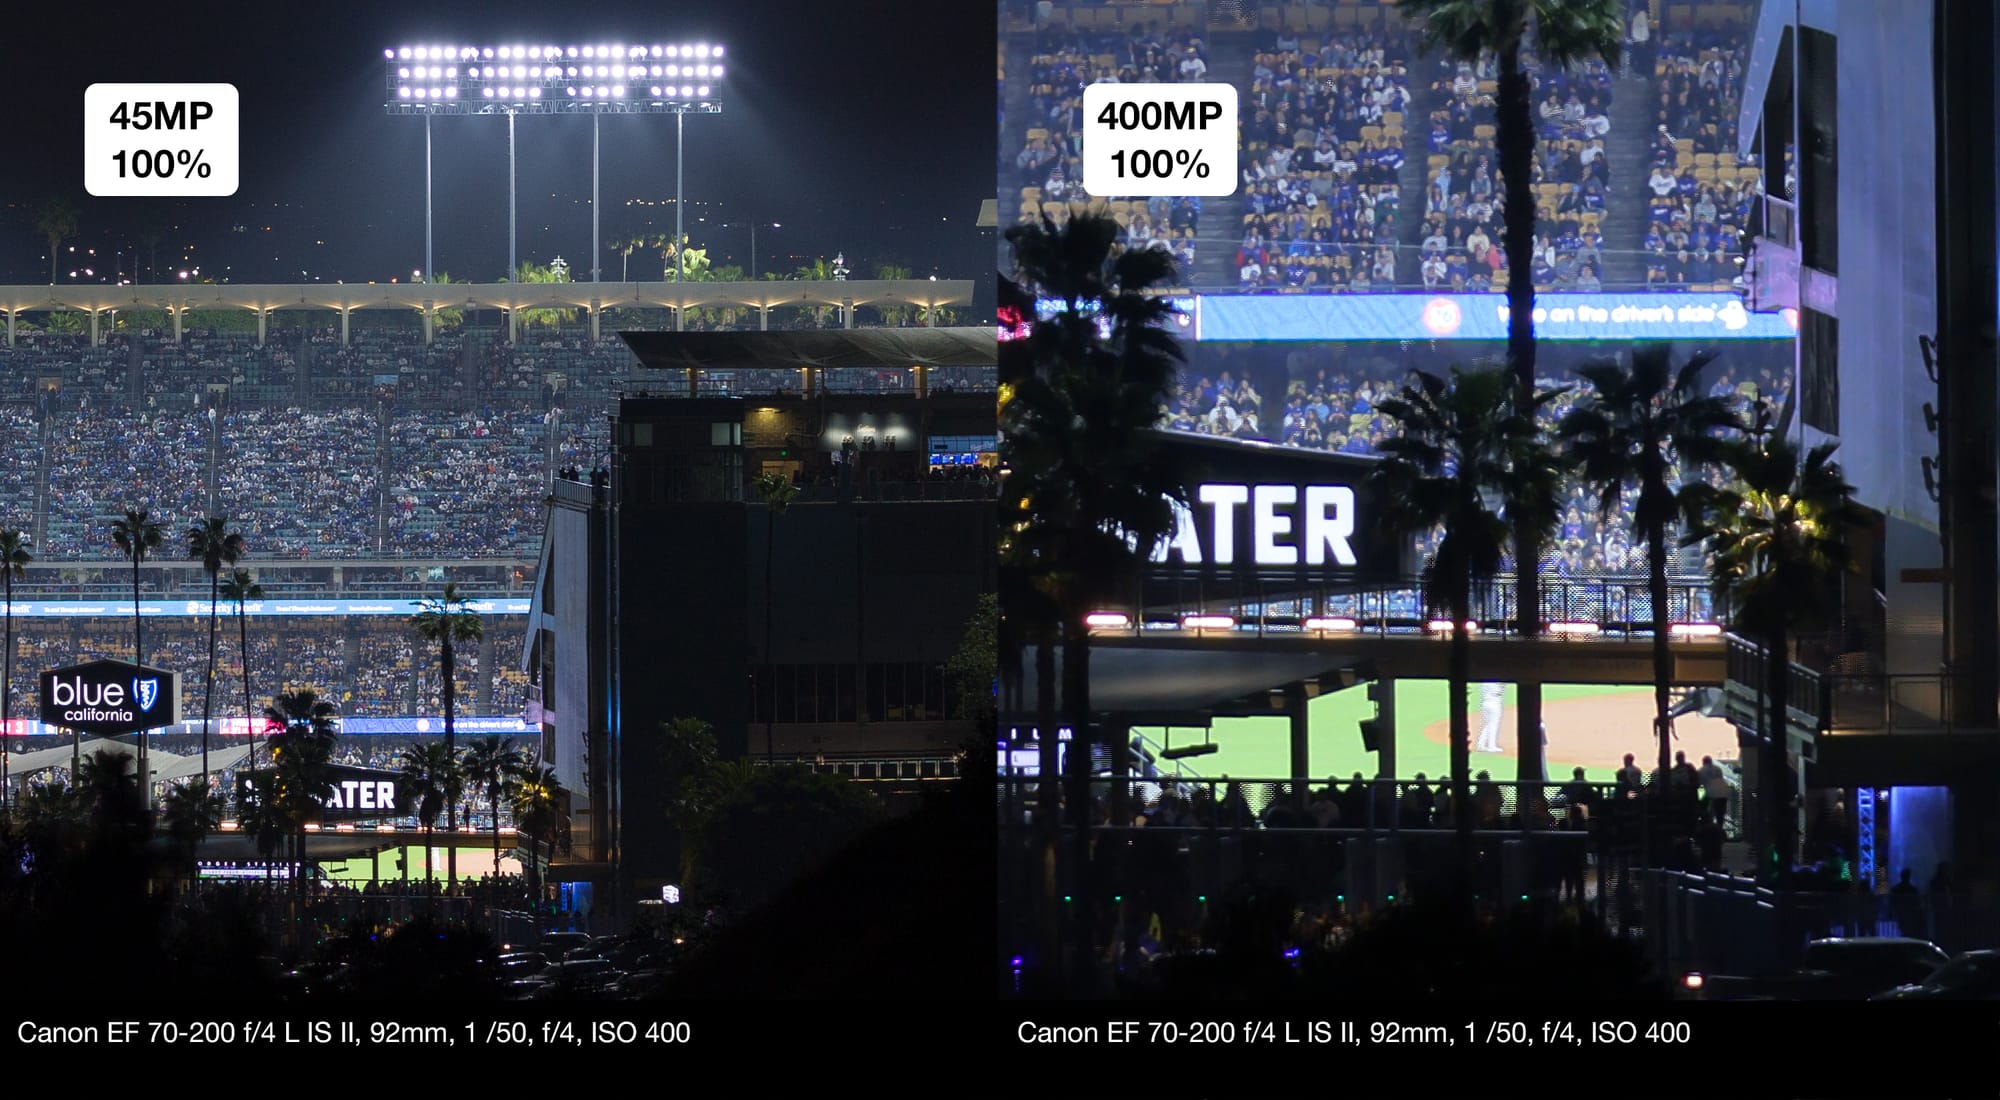
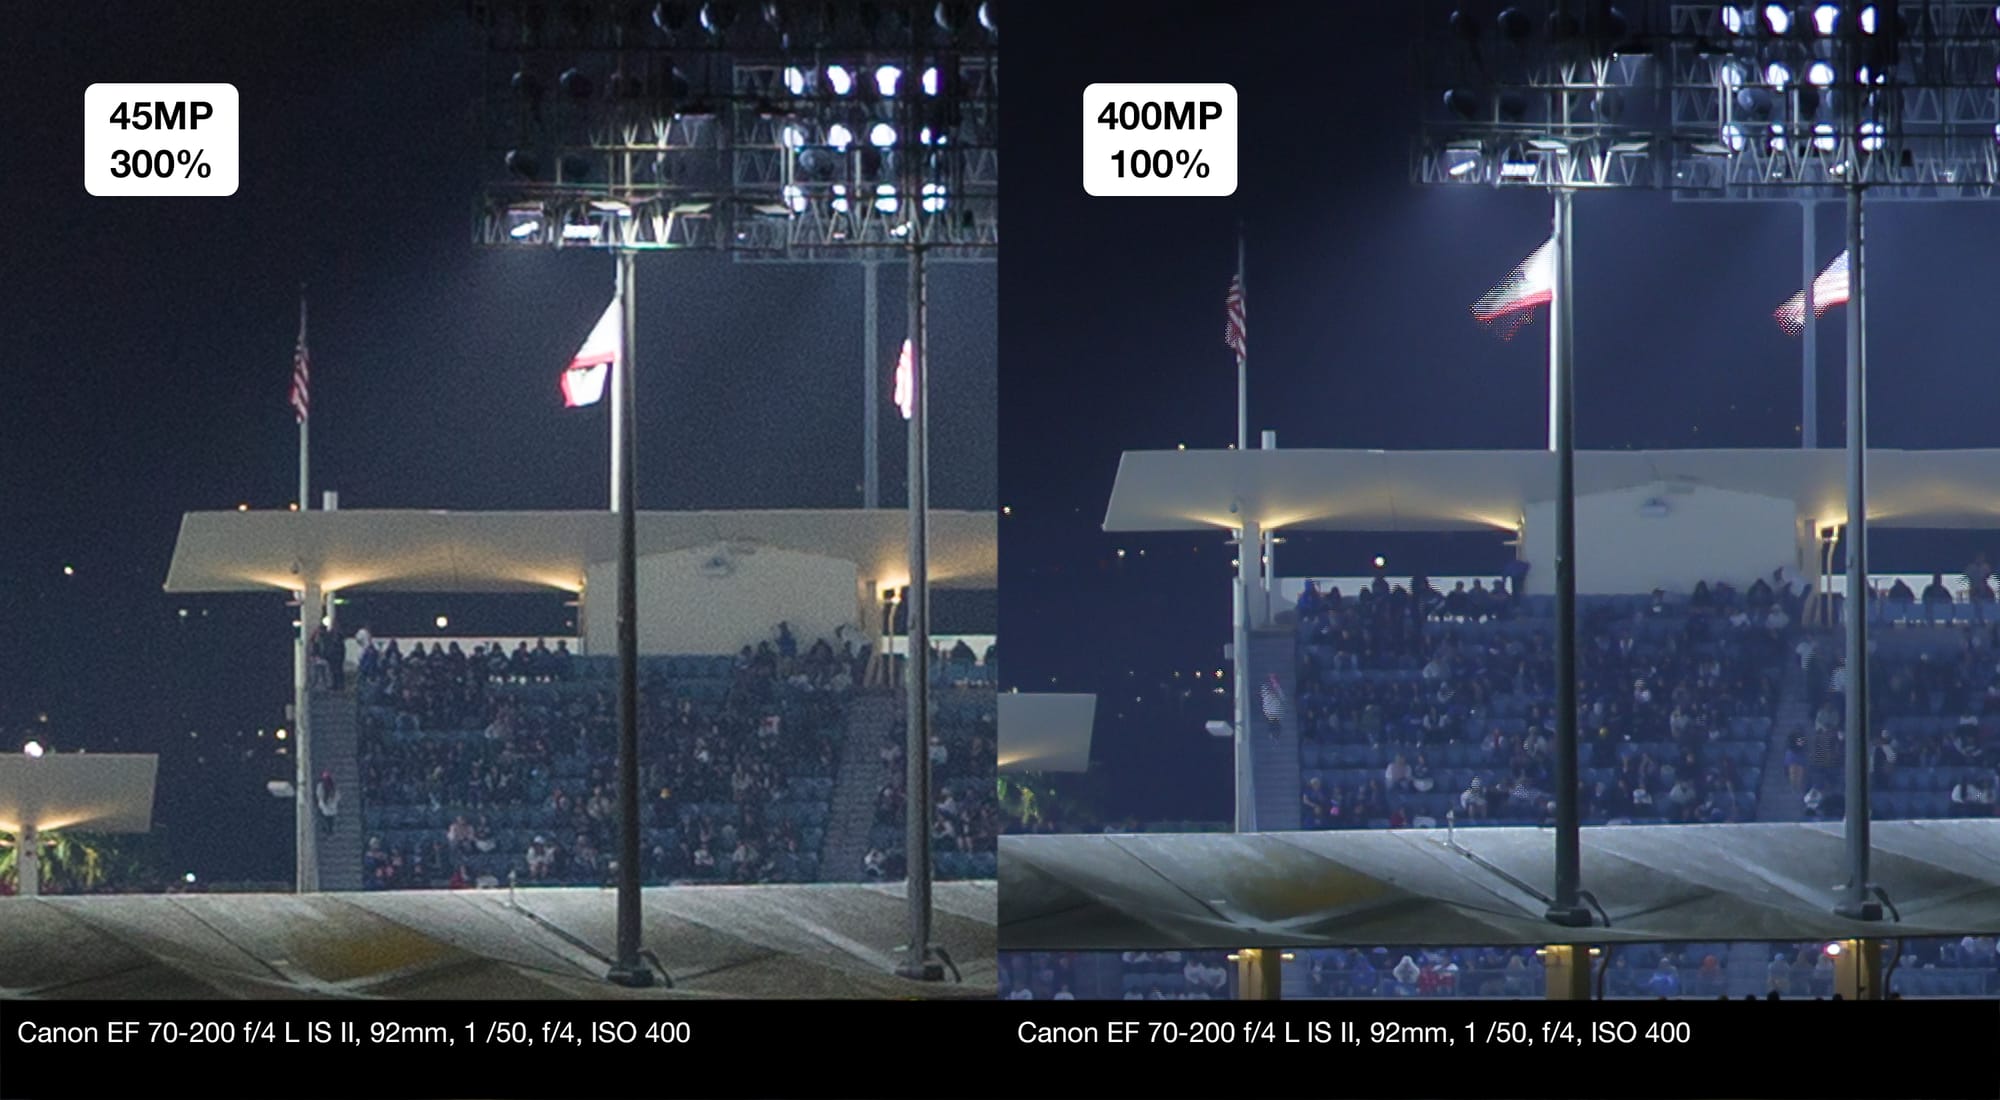
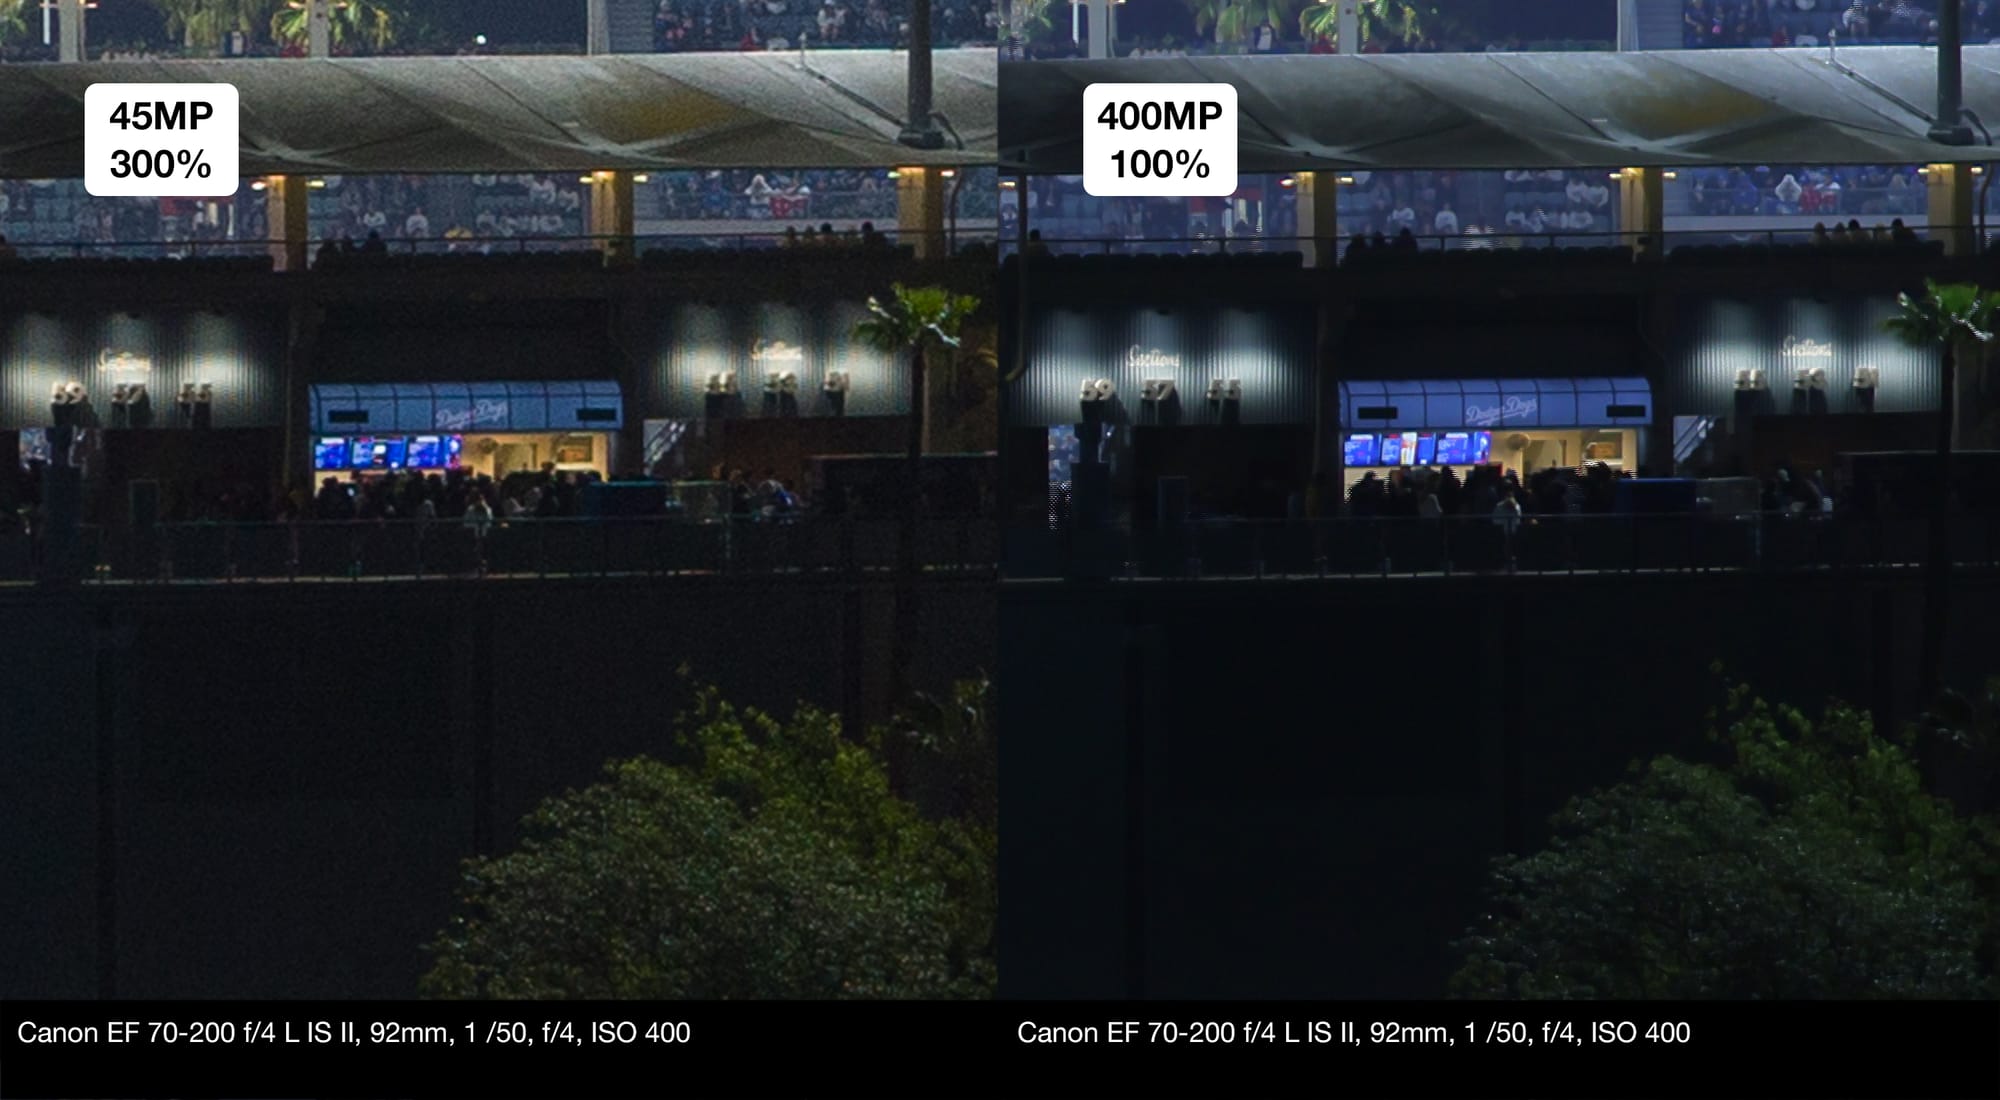
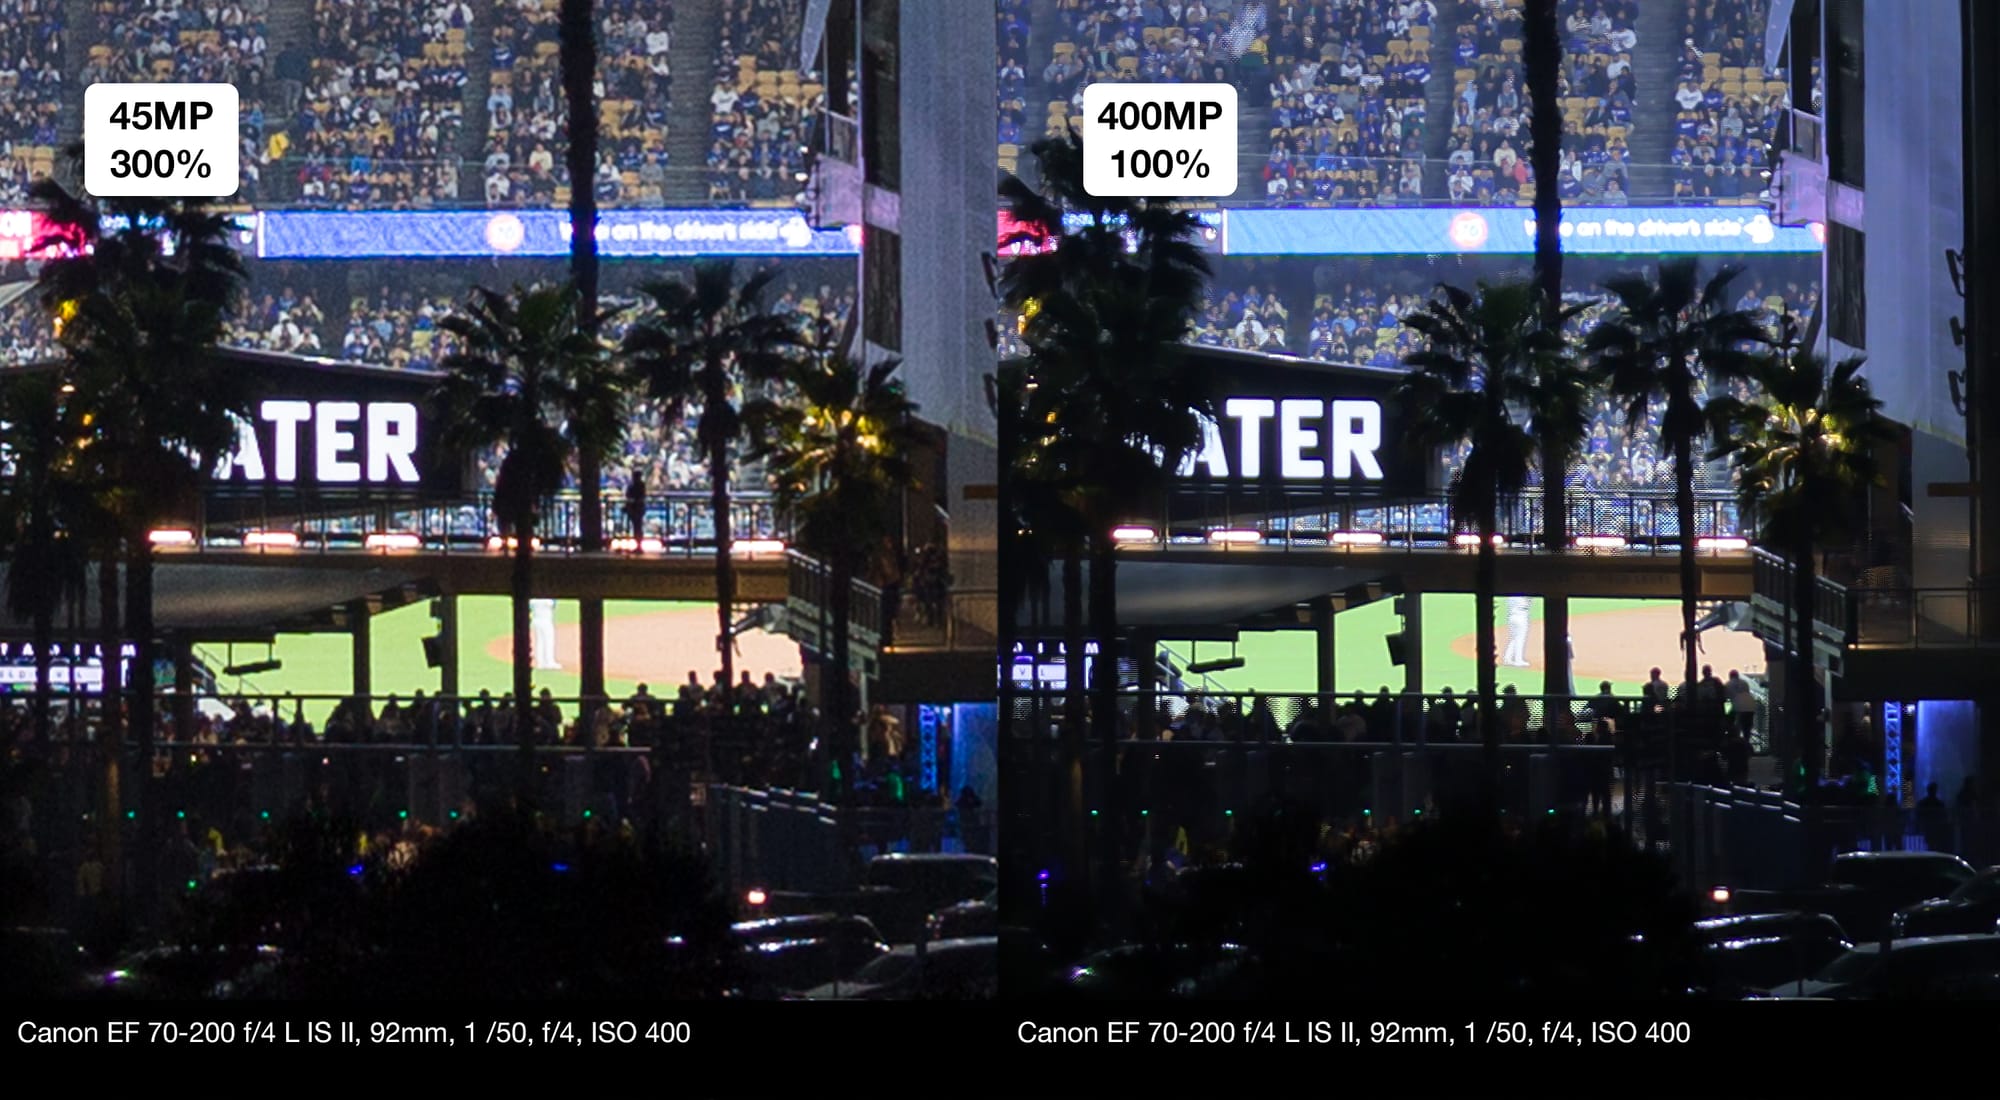
To my eye, in the high-res shot, lettering on the buildings is crisper, small color details are retained, there's less noise and just flat out more detail overall. It's not super dramatic with this lens, but you can definitely see an improvement, at least when zoomed in.
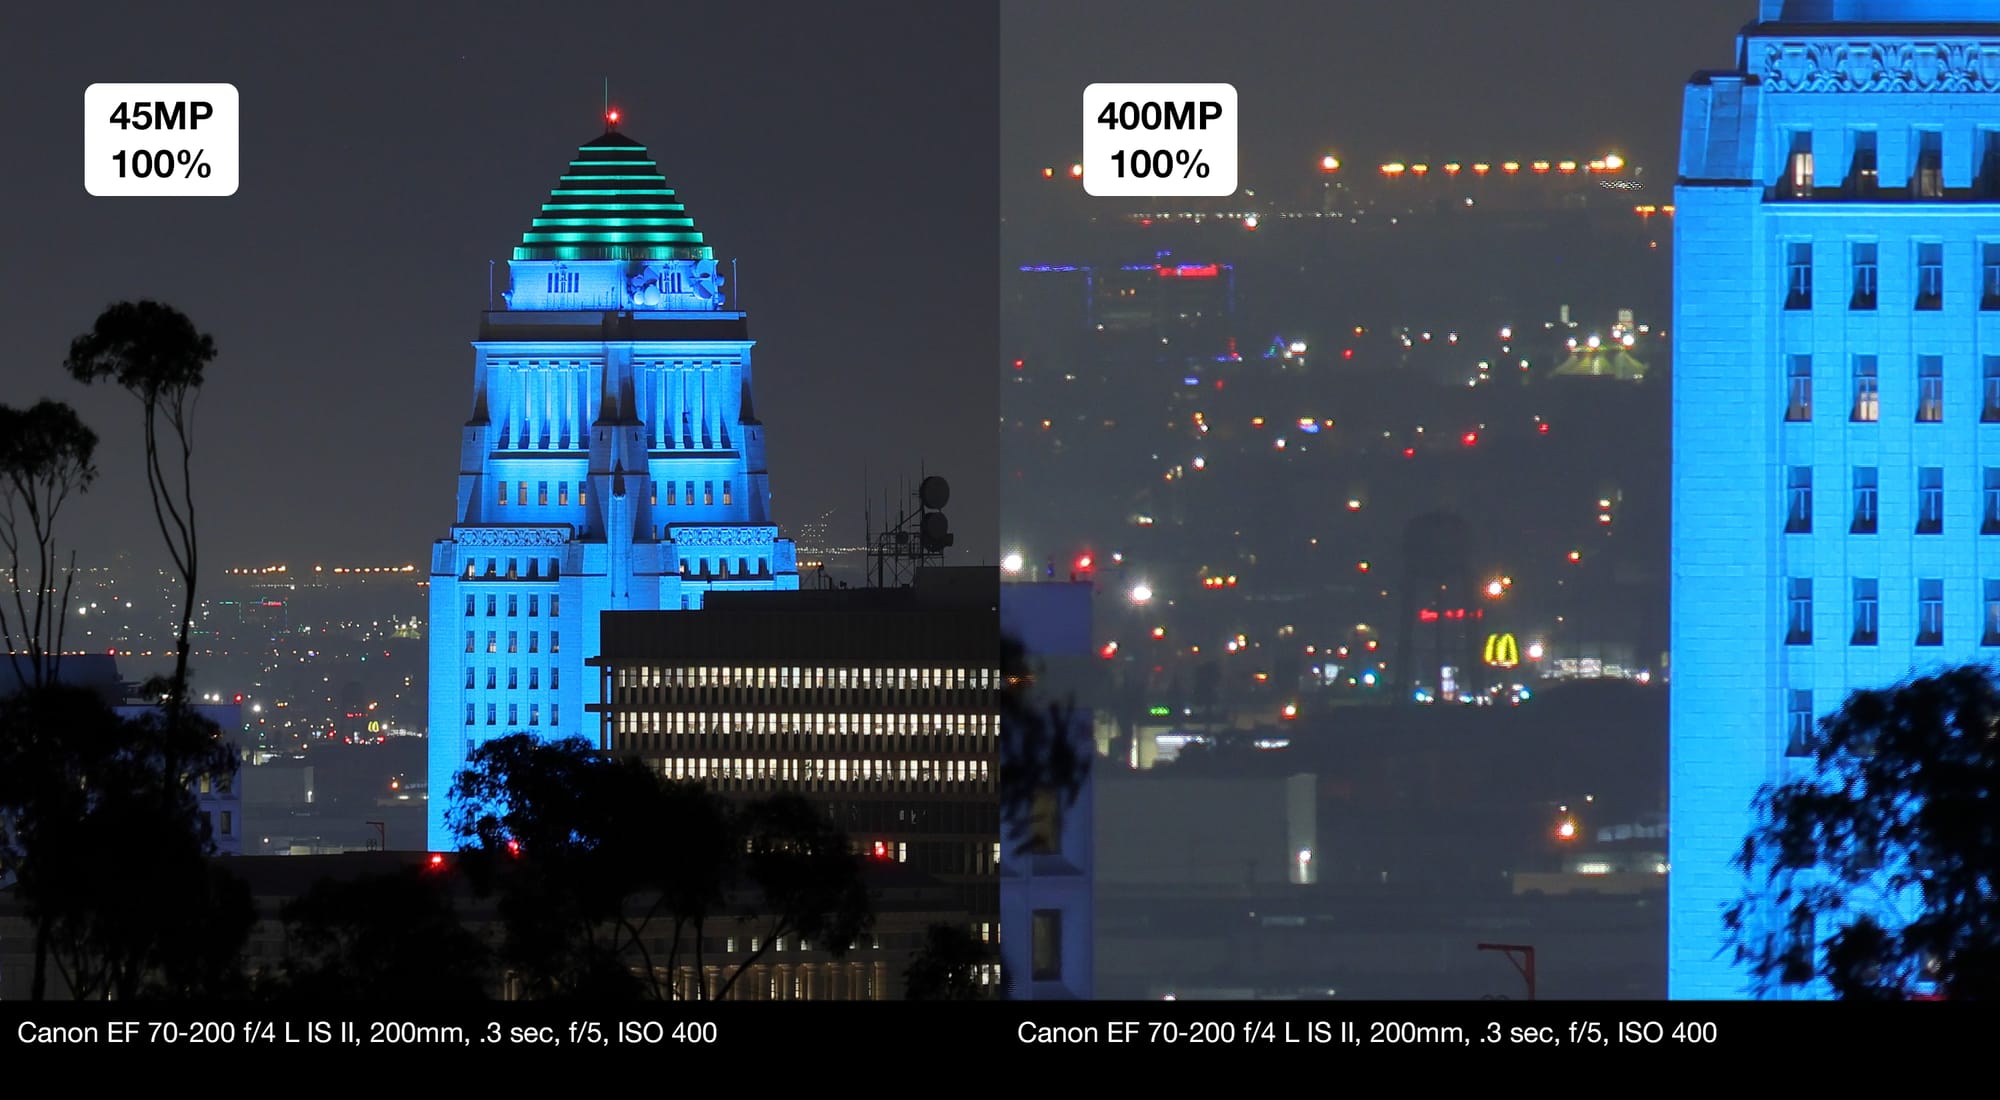
Then I decided to go a little nuts and created a 13-shot panorama of the city line with my 70-200 lens in portrait orientation, which each frame at 400MP! 😳
Lightroom failed to stitch it, so I turned to Photoshop. At first, after probably an hour+ of processing on my aging 2015 iMac, it stitched the whole pano, although it didn't blend each shot together. Weird. Ok, so then I tried stitching only a few frames at a time and then combining the whole pano together in post. It took FOREVER, but now I have a panorama that's large enough to be printed at 300 DPI and wallpaper a 22 ft long wall! It could only save it as a PSB, of course; the file is over 10GB. At first I couldn't even save it out as a JPEG, then I realized that the JPEG file format has a limit of 65,535 x 65,535 pixels, so I downscaled my 80,480(!) x 24,493 pano to be 65,535 pixels on the long end. It was so huge I couldn't really apply any additional edits to the file (hence the crooked horizon). You can download the JPEG here, if you want to see the detail yourself.
I wanted to show what it was like to go from 100% zoom to the full panorama, but Final Cut Pro didn't seem to support photos larger than 30k pixels, so I had to downscale again for this video:
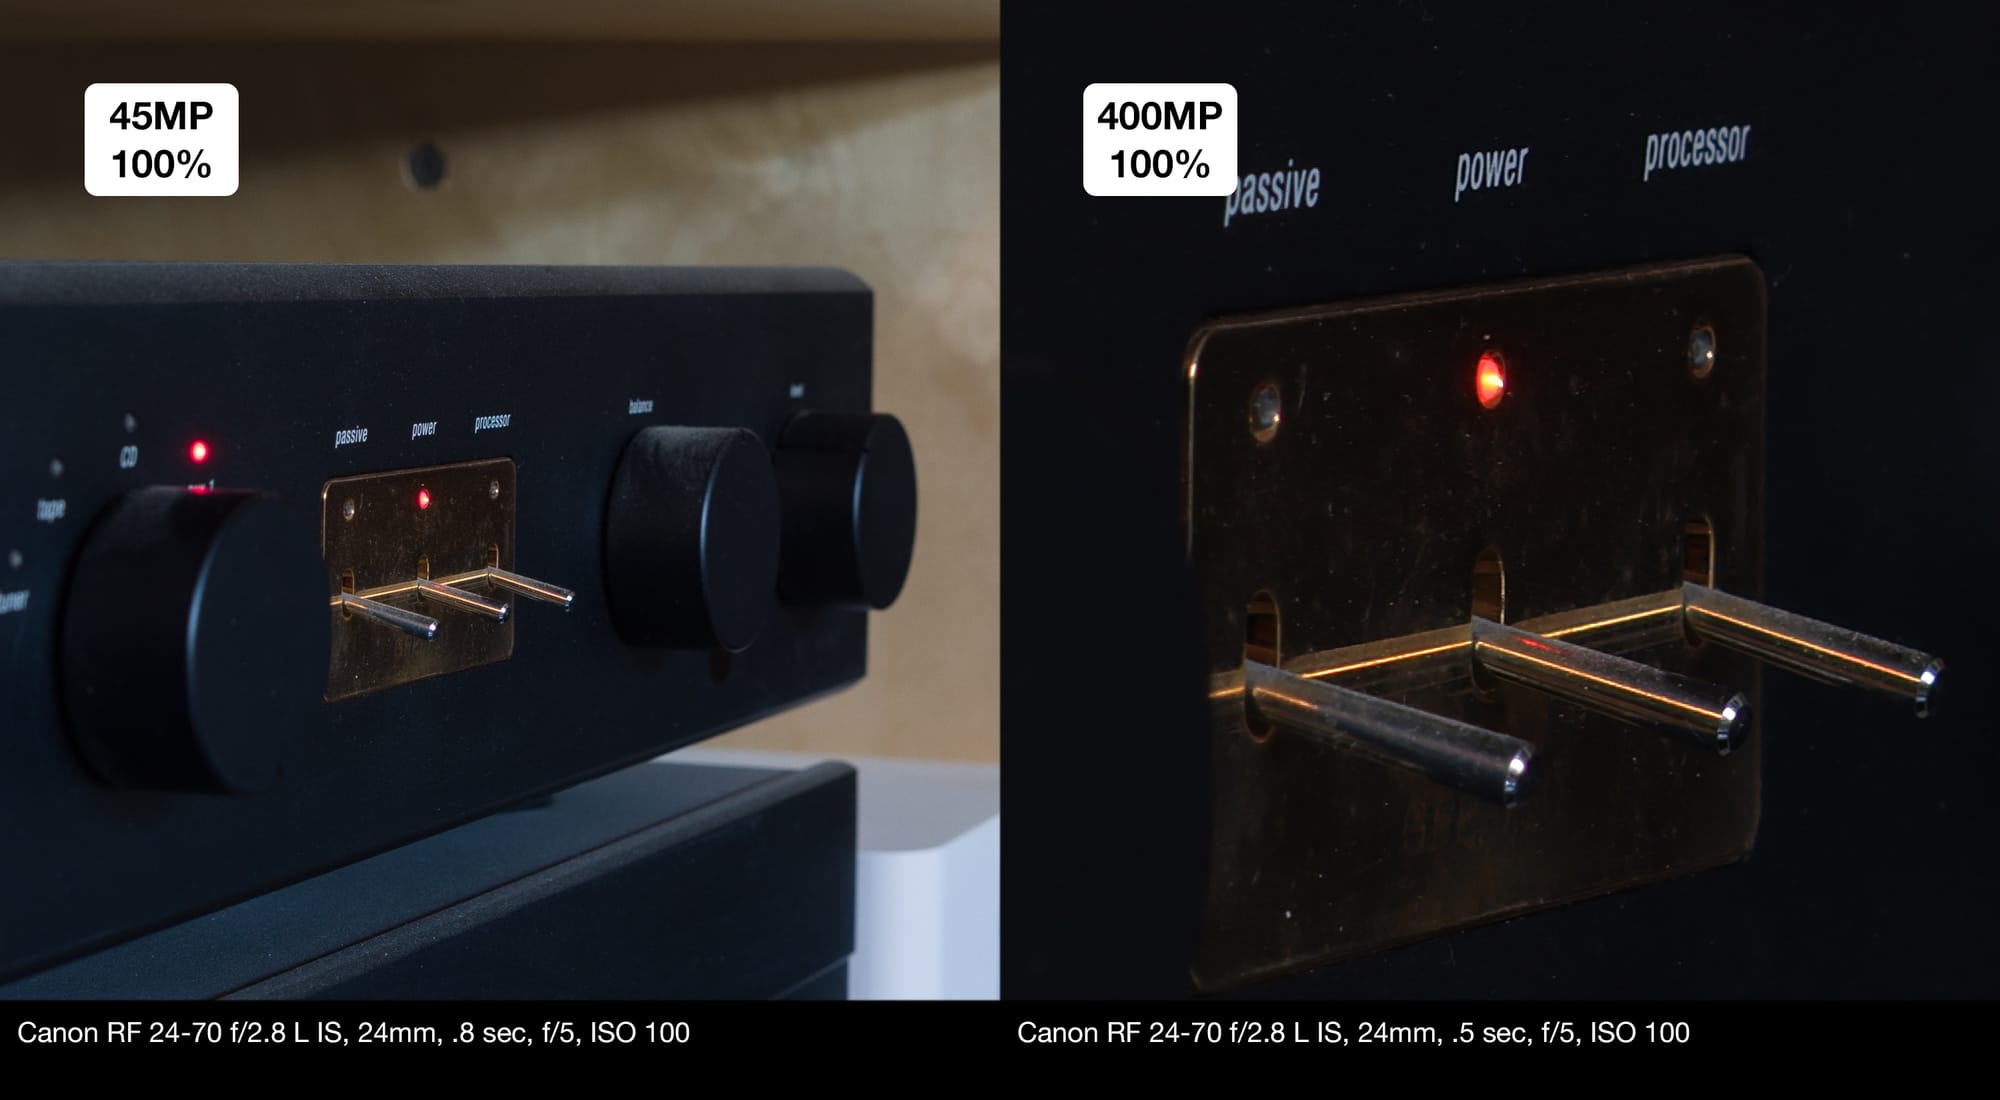
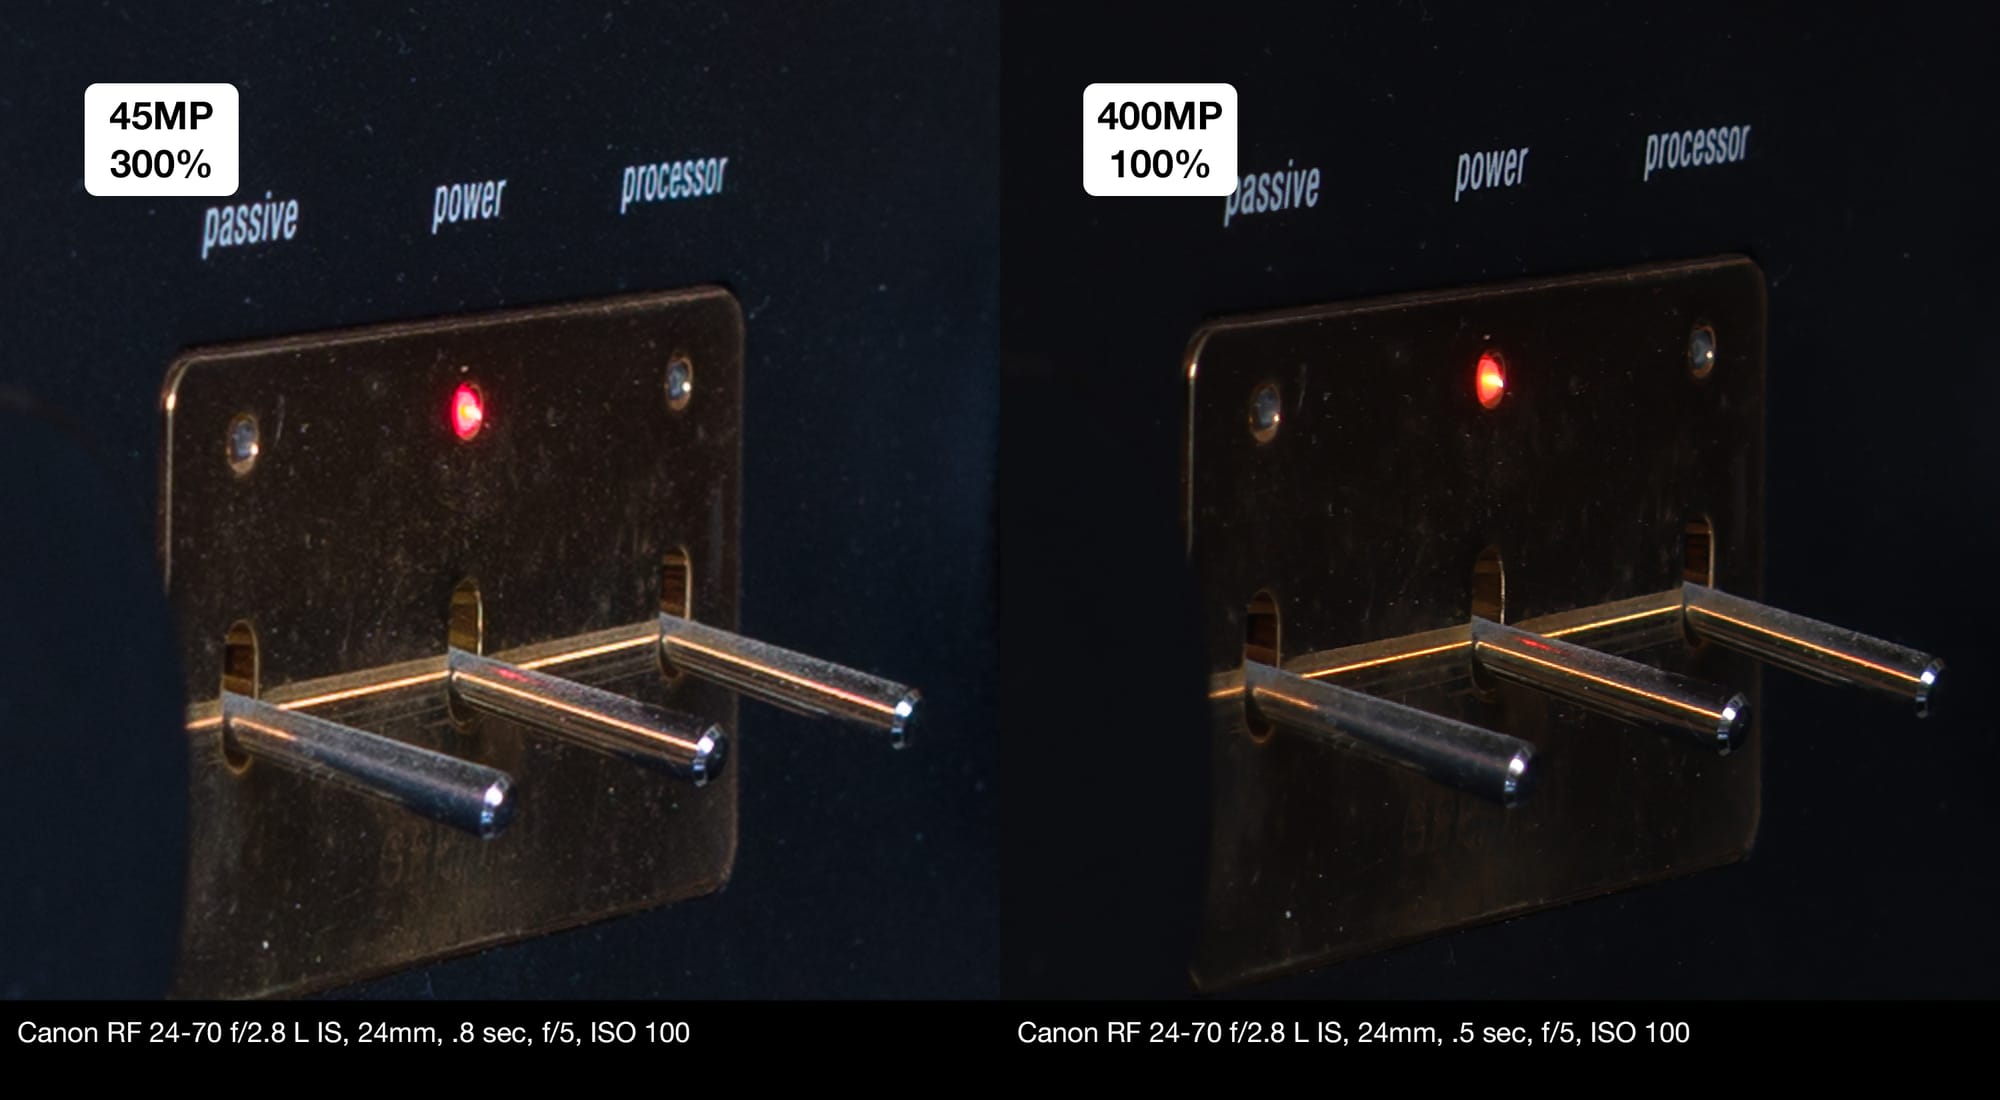
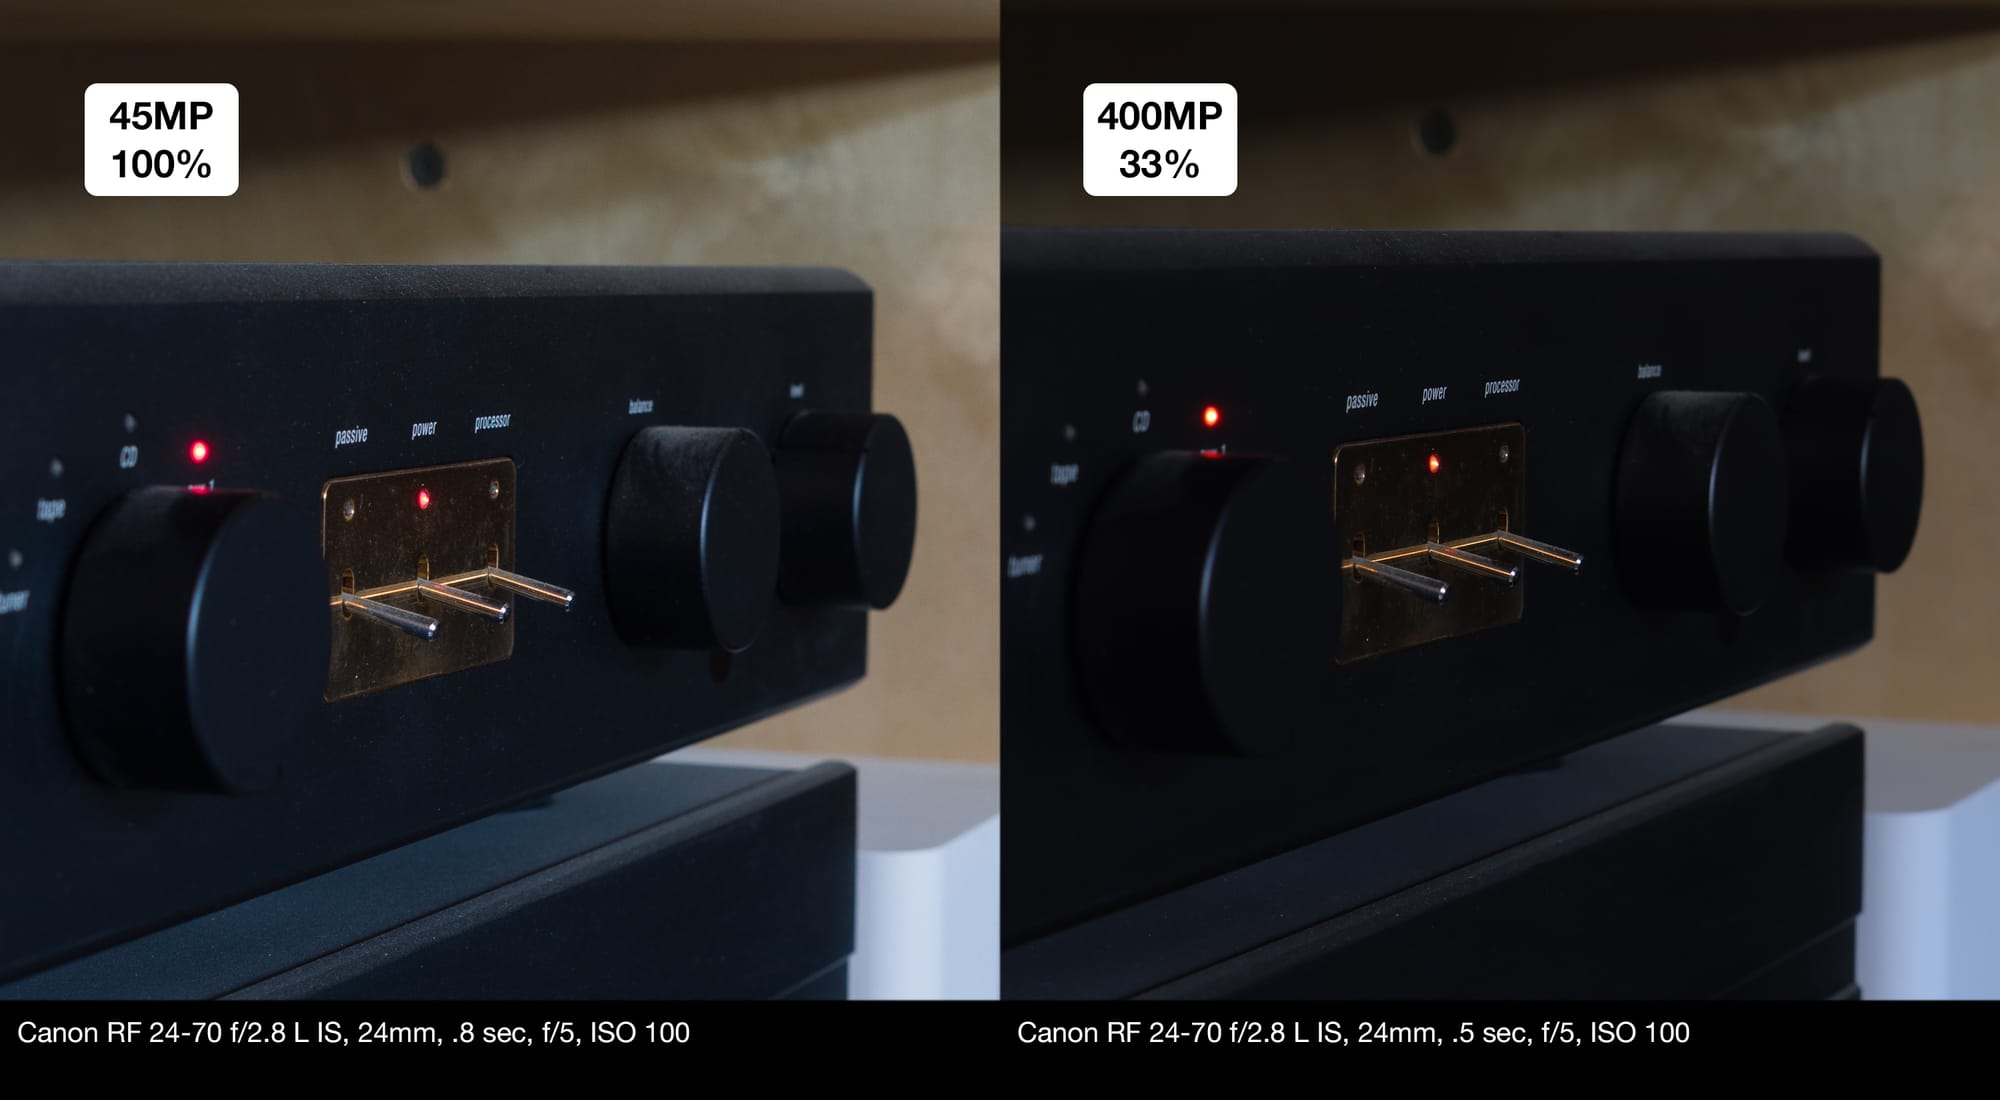
As it’s currently implemented, this feature might have some good uses beyond just being a fun novelty to play with. It seems to be a great way to test the limits of a lens' resolving power, for one. Likewise, it may be useful for ‘scanning’ film with a macro lens... When I first tried this feature out, I wasn't photographing an epic cityscape, but just taking a shot of the pre-amp next to my desk. This was shot on the 24-70, but you get a much sharper result at this closer focusing distance.
I hope Canon can figure out how to generate a raw file or at least an uncompressed tiff with this feature, because then we’d be able to use it professionally, except of course when there’s motion involved…
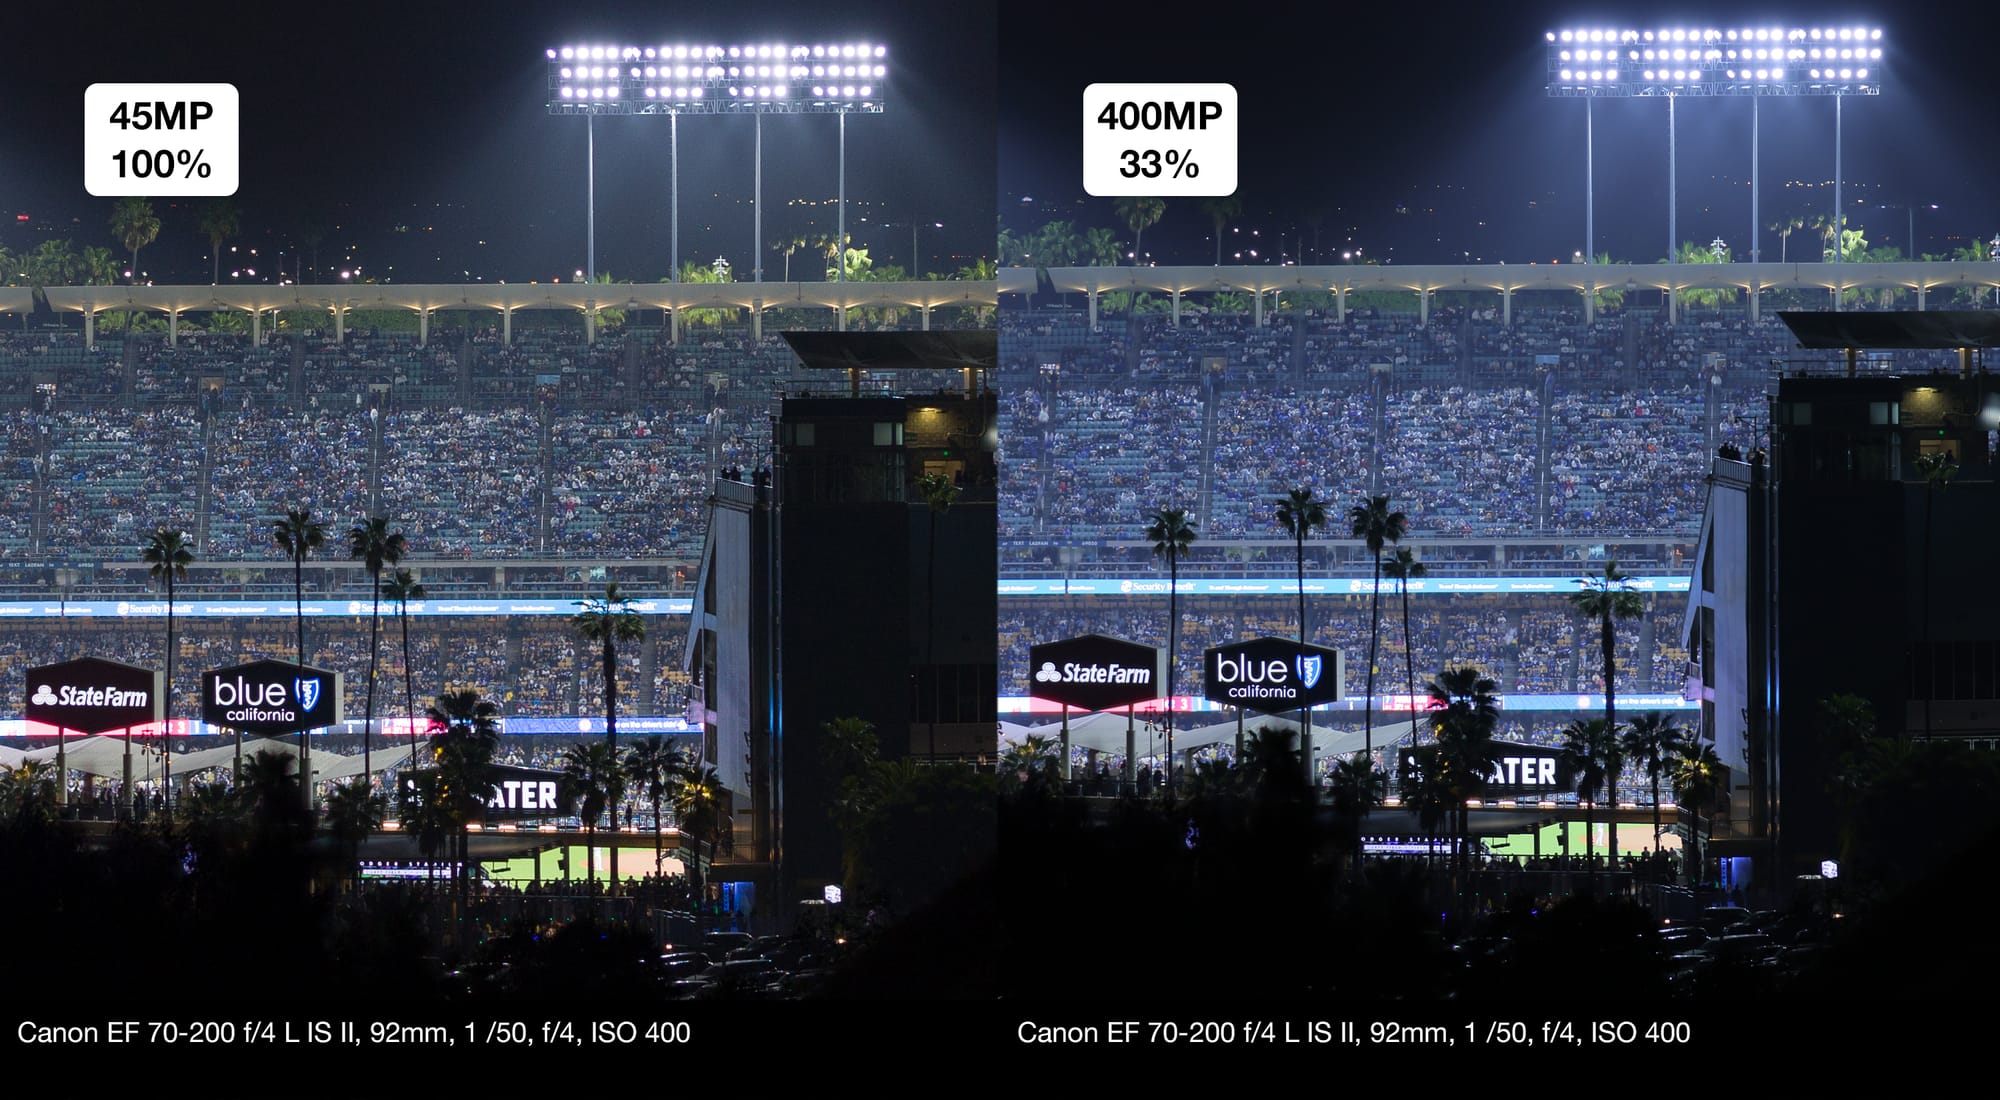
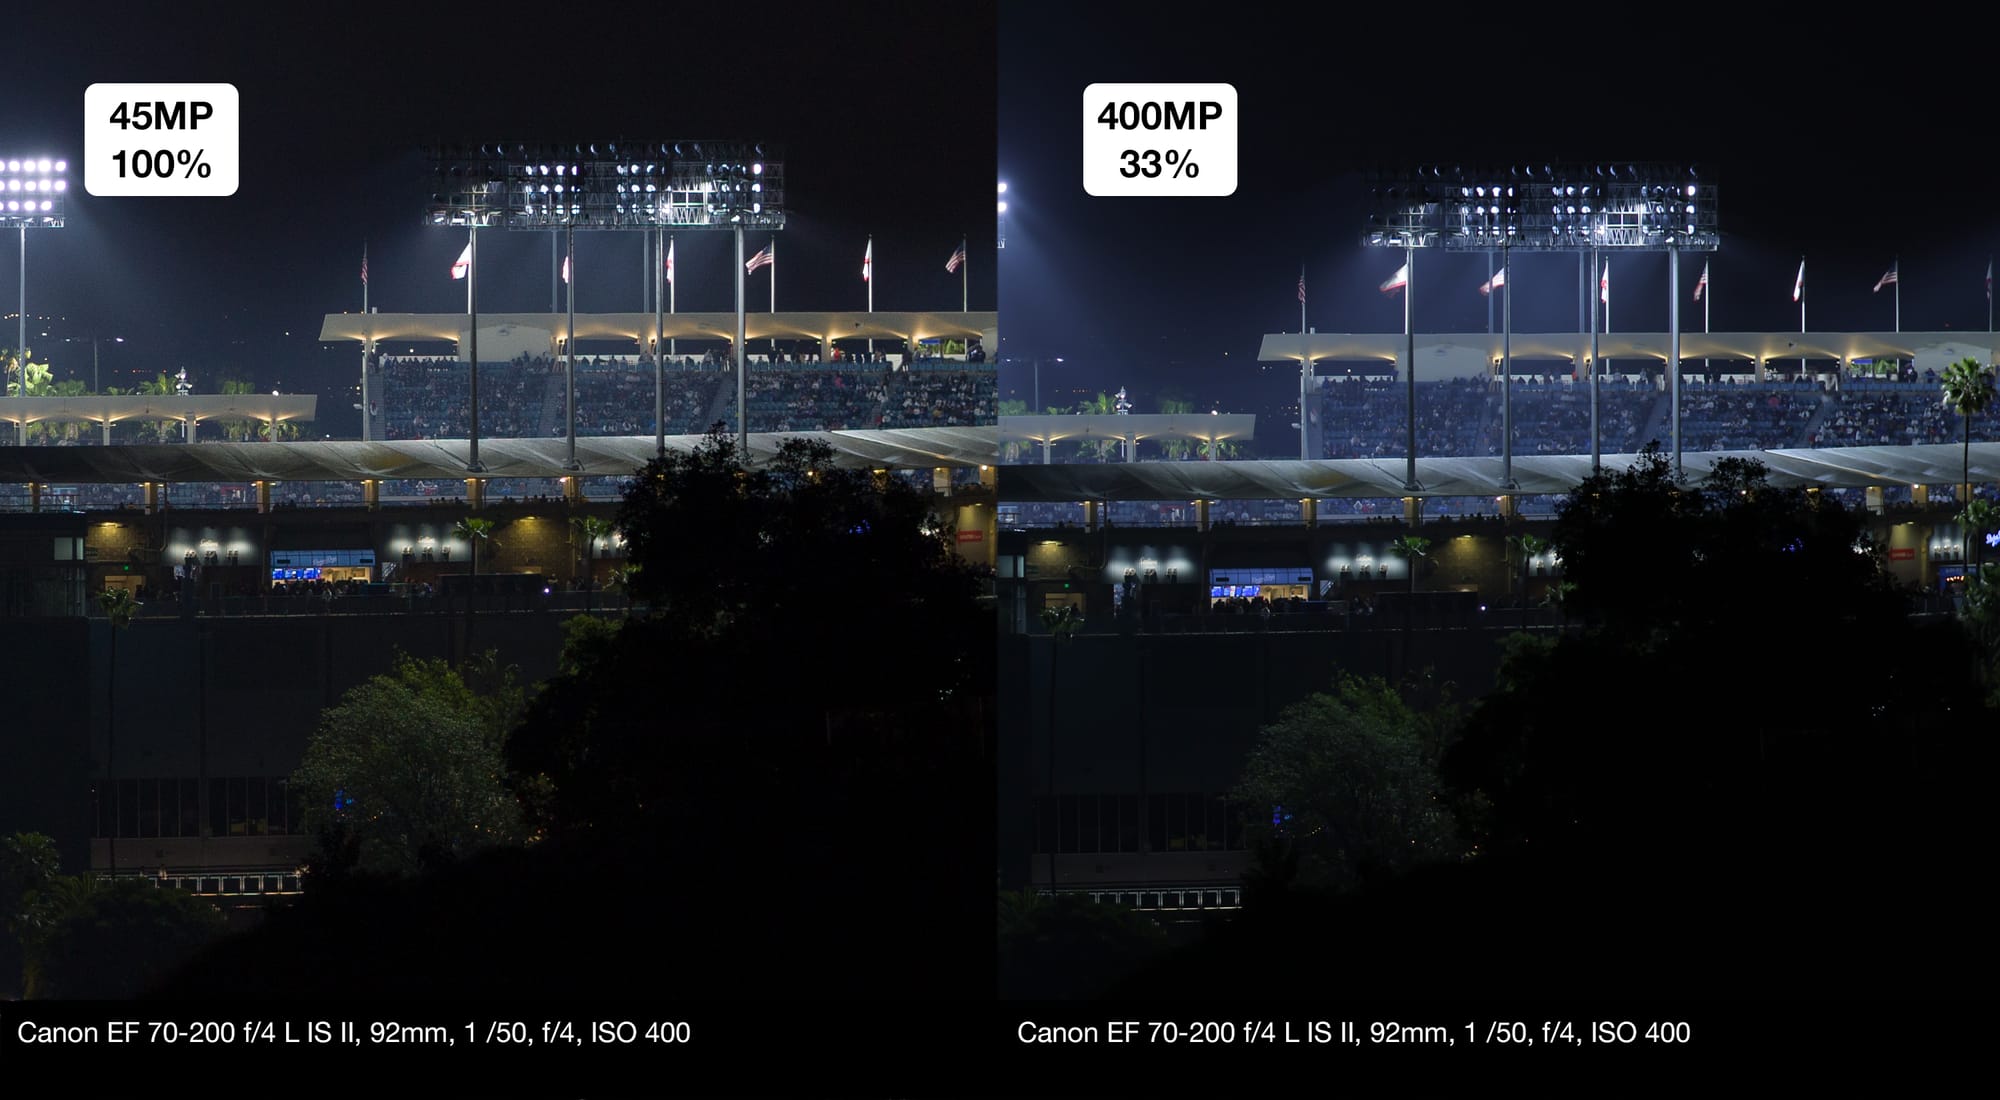
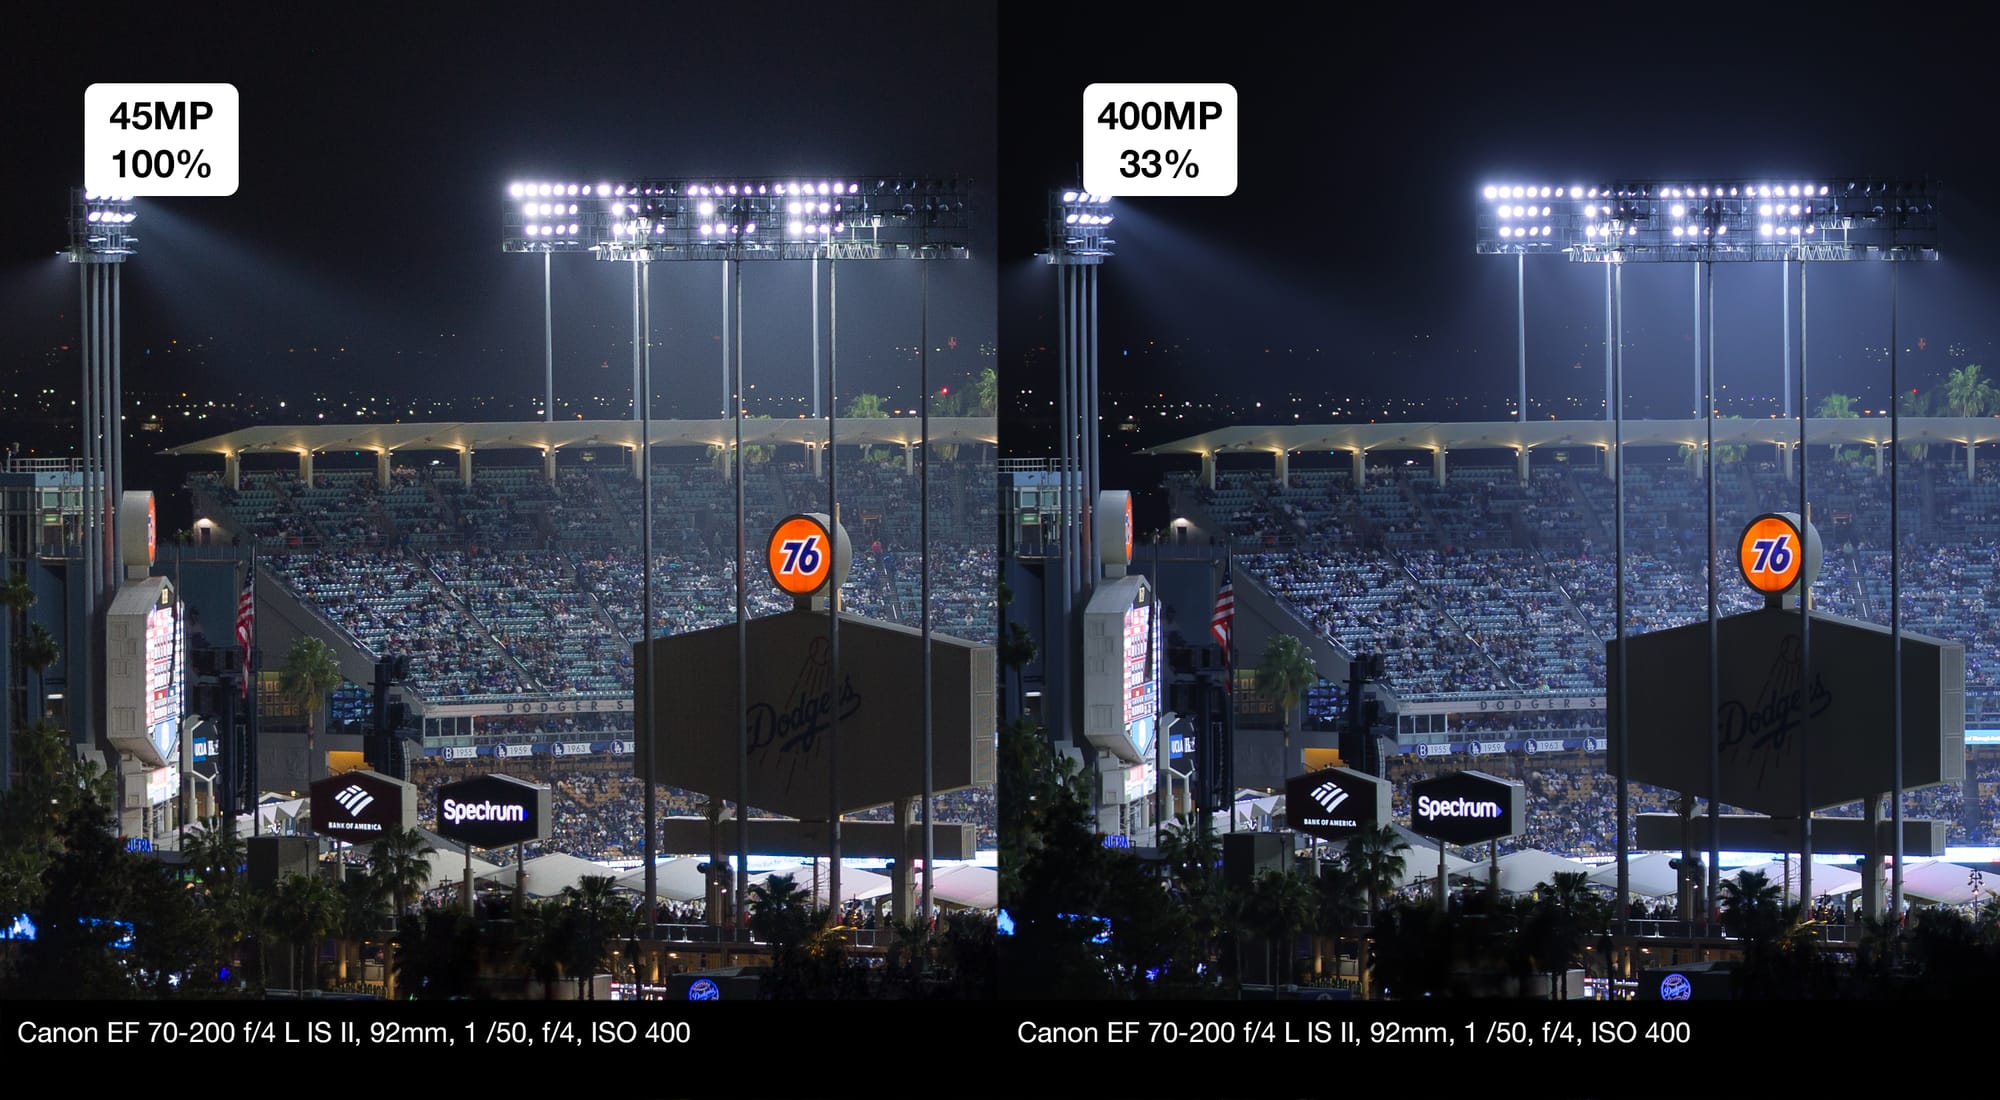
Finally, here are some comparison shots of Dodger Stadium: